How to Defeather a Chicken by Hand: A Step-by-Step Guide
Defeathering a chicken is a crucial step in poultry processing, ensuring that the bird is clean and ready for cooking. Whether you’re using a traditional method or a chicken defeathering machine, here’s a comprehensive guide to help you through the process.
Preparation
Before you begin, gather the necessary tools and equipment:
- Sharp Knife: For killing and cleaning the chicken.
- Large Pot: For scalding water.
- Thermometer: To check water temperature.
- Gloves: For handling the chicken and hot water.
- Bucket: To catch blood and feathers.
- Chicken Defeathering Machine (optional): For faster and more efficient plucking.
Step-by-Step Defeathering Process
1. Killing the Chicken
- Choose a Method: There are various humane methods, such as using a killing cone or a sharp knife to quickly cut the jugular vein. Ensure the chicken is calm to minimize stress.
- Bleed Out: Allow the chicken to bleed out completely by hanging it upside down. This takes a few minutes and ensures the meat stays fresh longer.
2. Scalding
- Heat Water: Fill a large pot with water and heat it to 145-150°F (63-66°C). Use a thermometer to maintain the correct temperature.
- Scald the Chicken: Hold the chicken by its feet and immerse it in the hot water for about 30-60 seconds. Move it around to ensure even scalding. The feathers should come out easily when the scalding is complete.
3. Plucking Feathers
Manual Plucking

- Hand Plucking: Begin by pulling out the large tail and wing feathers first, as they are the most stubborn. Then, move on to the smaller body feathers. Pluck against the grain for easier removal.
- Check for Pinfeathers: These are small, immature feathers that might be left behind. Use tweezers or a small knife to remove them.
Using a Chicken Defeathering Machine
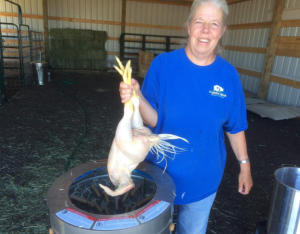
- Prepare the Machine: Set up your defeathering machine according to the manufacturer’s instructions.
- Load the Machine: Place the scalded chicken into the machine. Ensure not to overcrowd it; most machines can handle 1-4 chickens at a time.
- Start the Machine: Turn on the machine and let it run for about 30-60 seconds. The rubber fingers will remove the feathers.
- Inspect the Chicken: Once the machine stops, check the chicken for any remaining feathers and remove them manually if needed.
Post-Defeathering Cleanup
- Evisceration: Make a small incision near the vent and carefully remove the internal organs. Be cautious not to puncture any organs to avoid contamination.
- Clean the Chicken: Rinse the chicken thoroughly inside and out with cold water.
- Store or Cook: The chicken is now ready for cooking or can be stored in a refrigerator or freezer.
Tips for Efficient Defeathering
- Proper Scalding: The key to easy feather removal is proper scalding. If the water is too hot, it can cook the skin; if it’s too cool, the feathers won’t loosen properly.
- Use Gloves: Handling hot water and feathers can be tough on your hands, so wear gloves for protection.
- Check Temperature: Keep the water temperature consistent throughout the scalding process.
- Clean Workspace: Maintain a clean and organized workspace to prevent contamination and ensure hygiene.
Common Issues and Solutions
- Feathers Not Coming Off Easily: This usually means the scalding water wasn’t hot enough or the chicken wasn’t immersed long enough. Adjust the water temperature and duration accordingly.
- Skin Tearing: This can occur if the water is too hot or the chicken is left in the defeathering machine too long. Maintain proper scalding temperature and monitor the machine closely.
- Remaining Pinfeathers: These can be stubborn. Use tweezers or a small knife to carefully remove them after the main feathers are plucked.
Conclusion
Defeathering a chicken can be a straightforward process with the right tools and techniques. Whether you choose to pluck manually or use a defeathering machine, ensuring proper scalding and gentle handling will make the task easier and more efficient. Follow these steps, and you’ll have a clean, ready-to-cook chicken in no time. Happy processing!