
Best Way to Defeather a Chicken
Defeathering a chicken efficiently can save you time and ensure a clean, ready-to-cook bird. Whether you’re processing poultry for the first time or looking for ways to streamline your current method, here’s a step-by-step guide to the best way to defeather a chicken.
Why Use a Chicken Defeathering Machine?
Using a chicken defeathering machine offers several advantages:
- Efficiency: Quickly defeather multiple birds in minutes.
- Consistency: Ensures even plucking without damaging the skin.
- Ease of Use: Simple operation requiring minimal effort.
- Hygiene: Maintains sanitary conditions by reducing hand contact.
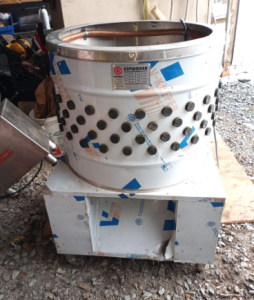
Recommended Chicken Defeathering Machines
Amazon offers a variety of reliable chicken defeathering machines. Here are some top recommendations:

Yardbird 21833 Chicken Plucker
- Capacity: Handles 2-3 chickens at a time.
- Power: 1.5 HP motor.
- Material: Stainless steel tub and housing.
- Special Features: Integrated irrigation ring, easy to move with built-in wheels.
- Price: $$
Kitchener Chicken Plucker
- Capacity: Suitable for up to 4 chickens.
- Power: 1.2 HP motor.
- Material: Food-grade stainless steel.
- Special Features: Feather discharge chute for easy cleanup, waterproof on/off switch.
- Price: $$
PowerPlucker Pro
- Capacity: Efficient for small batches, 2-3 chickens.
- Power: 1 HP motor.
- Material: Aluminum alloy.
- Special Features: Compact design, easy to assemble and disassemble for cleaning.
- Price: $
EZPlucker EZ-151
- Capacity: Processes 1-2 chickens.
- Power: 1.5 HP motor.
- Material: Stainless steel.
- Special Features: Portable design, suitable for quail, pigeons, and other small birds.
- Price: $$
Step-by-Step Defeathering Process
1. Preparation
Gather the necessary tools and equipment:
- Sharp Knife: For killing and cleaning the chicken.
- Large Pot: For scalding water.
- Thermometer: To check water temperature.
- Gloves: For handling the chicken and hot water.
- Bucket: To catch blood and feathers.
- Chicken Defeathering Machine: For efficient plucking.
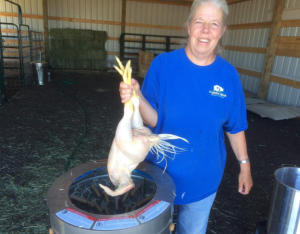
2. Killing the Chicken
- Choose a Method: Use a humane method, such as a killing cone or a sharp knife to quickly cut the jugular vein. Ensure the chicken is calm to minimize stress.
- Bleed Out: Allow the chicken to bleed out completely by hanging it upside down for a few minutes to ensure the meat stays fresh longer.
3. Scalding
- Heat Water: Fill a large pot with water and heat it to 145-150°F (63-66°C). Use a thermometer to maintain the correct temperature.
- Scald the Chicken: Hold the chicken by its feet and immerse it in the hot water for about 30-60 seconds. Move it around to ensure even scalding. The feathers should come out easily when the scalding is complete.
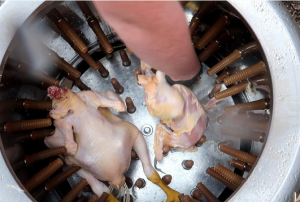
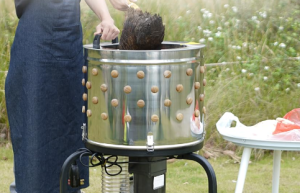
4. Plucking Feathers
Using a Chicken Defeathering Machine
- Prepare the Machine: Set up your defeathering machine according to the manufacturer’s instructions.
- Load the Machine: Place the scalded chicken into the machine. Ensure not to overcrowd it; most machines can handle 1-4 chickens at a time.
- Start the Machine: Turn on the machine and let it run for about 30-60 seconds. The rubber fingers will remove the feathers.
- Inspect the Chicken: Once the machine stops, check the chicken for any remaining feathers and remove them manually if needed.
Post-Defeathering Cleanup
- Evisceration: Make a small incision near the vent and carefully remove the internal organs. Be cautious not to puncture any organs to avoid contamination.
- Clean the Chicken: Rinse the chicken thoroughly inside and out with cold water.
- Store or Cook: The chicken is now ready for cooking or can be stored in a refrigerator or freezer.
Tips for Efficient Defeathering
- Proper Scalding: The key to easy feather removal is proper scalding. If the water is too hot, it can cook the skin; if it’s too cool, the feathers won’t loosen properly.
- Use Gloves: Handling hot water and feathers can be tough on your hands, so wear gloves for protection.
- Check Temperature: Keep the water temperature consistent throughout the scalding process.
- Clean Workspace: Maintain a clean and organized workspace to prevent contamination and ensure hygiene.
Common Issues and Solutions
- Feathers Not Coming Off Easily: This usually means the scalding water wasn’t hot enough or the chicken wasn’t immersed long enough. Adjust the water temperature and duration accordingly.
- Skin Tearing: This can occur if the water is too hot or the chicken is left in the defeathering machine too long. Maintain proper scalding temperature and monitor the machine closely.
- Remaining Pinfeathers: These can be stubborn. Use tweezers or a small knife to carefully remove them after the main feathers are plucked.
Conclusion
Defeathering a chicken can be a straightforward process with the right tools and techniques. Using a chicken defeathering machine from Amazon can significantly ease the process, making it faster and more efficient. Follow these steps, and you’ll have a clean, ready-to-cook chicken in no time. Happy processing!